Happy Thanksgiving!


I am so very grateful for each and every one of YOU my readers!! Praying you each have a blessed day wherever you are!

If you have a few minutes, please take time to read this article to gain a glimpse into my thoughts & feelings as well as so many other moms like myself this holiday season!

Blessings!!!

Free Small Appliances at Kohl's

UPDATE: 2 of the 4 appliances are sold out. I don't know if they will be restocking them or not so definitely keep checking the links in case they do. In order to get the $15 Kohl's cash & free shipping, you'll have to add something else to your order in addition to the 2 appliances that are left in order to hit $50. (you can still get the rebates on the 2 appliances that are left.)

I  mentioned last week on my blog Facebook Fan Page that I would try to share deals as I see them in the coming weeks. This is one I did last year and you can't BEAT getting FREE small appliances (after rebates).

How it works, go to either Shop At Home or if you have a discover card, go to shop discover & log in through there. Using either of these will give you an additional 10% cash back. (you have to go to one of these places first which will then redirect you to Kohl's or you won't get the extra 10% cash back.) Then when at Kohl's, you have to buy 3 different appliances for $19.99 each.


4 quart programmable slow cooker
Presto Cool Touch 20" electric griddle
Bella Rotating Waffle Maker
Bella Panini Maker

Add them to your cart. Your total will be $59.99. (or a few dollars more with tax).
At checkout, use code BLACKFRI for 15% off
Pay $50.43 (or close to that amount)
Shipping is free over $50
Use this rebate for $36.00 back in visa gift card (you'll need to cut off the UPC's from the product once you get it.
This brings the total of the appliances down to $14.97 for the 3 appliances
You'll then get $15 in kohl's cash to spend from 12/2-12/9. So your appliances end up free!!!!!!

I use my small appliances heavy and with a large family, it helps having extra ones around. Be sure to follow my Facebook Page to keep up with the latest deals as I won't always be able to post them on my blog. And feel free to spread the word! :)


My Heart Hurts

It's been a crazy last few days. So it goes. We just packed up a box for Operation Christmas Child. We started participating in this charity after Noah died, figuring since we can't give him gifts, we can bless a boy his age with some gifts. That's what makes it bittersweet. We LOVE being able to shop & pick out special things for a child Noah's age.

But as we put everything into a box tonight and wrote a Christmas card to this unknown boy & took a picture for him, it all hits me. I should be anticipating buying gifts for my 3 year old.

I just can't stop crying.

I am missing Noah SO MUCH!!!!

This just sucks. It's an ache that is just indescribable.  One that is always there under the surface and sometimes things like packing this box just knocks the wind out of me.

While I am thankful we can bring a smile to the face of a sweet little boy in a far away country, I still wish I had my son here to wrap gifts for. I still at times question God and ask WHY did he feel the need to take my son Home so soon.

It truly isn't fair. So  many people take their children for granted and here I am longing & aching for my sweet Noah. A piece of me that will always be missing with every breath I take.

Dear Jesus, take this box of gifts and use it to bless a precious boy in memory of Noah. I pray this boy knows how much he is loved and knows we are praying for him!!!


Breastfeeding Photo Shoot

Breastfeeding is such a special time for mom & baby. I've had the privilege to nurse all my children (including my twins exclusively) yet rarely do I have any pictures of me feeding them. I take that back, I think I have one picture of when I was in the hospital nursing both my twins at the same time.

Sorry, not posting THAT picture!

Recently, my friend over at Still Playing School held a giveaway for a breastfeeding photo shoot to be done by Ronice Kay Photography and I was ecstatic to have won it!

Ronice asked if I had any specific place I wanted it held at but I really didn't have a certain location in mind. She suggested a memorial park about 10 minutes from me where ironically I had a few of my senior pictures taken there many moons ago.

Nope, not showing you those pictures either! haha

Anyway, our schedules finally lined up last month to meet for my much anticipated shoot. Of course, I was agonizing over what Ava & I would wear. Ronice gave me some websites to check out on tips for dressing for pictures which helped.

So with Ronice's permission, I am sharing with you a few of the photos she took. I seriously loved them all and can't choose a favorite.

*note, because I watermark all photos shared here but I didn't take these pics, I am putting Ronice's name on them. This isn't her official watermark.


haha check out the thumbs up Ava was giving! Guess she loves her mama's milk!

Love how Ronice captured a piece of Noah with Ava <3


 Ronice was SO sweet to surprise me by offering to take a picture of me with all 7 of my children! 

 I am always the one behind the camera so this was a rare treat to have one of them with me!


If you are local, go check out Ronice Kay Photography. She was wonderful to work with and captured some great shots! Thanks again Ronice for these priceless photos! 

Butternut Squash Cupcakes w/Maple Cream Cheese Icing

The theme of the cooking class I teach this semester is entitled "Fresh Foods", meaning the main ingredient I use has to be something in season. Thankfully I live in an area surrounded by farm stands now that my garden is done producing. This week I wanted to change things up and make a dessert using an unusual ingredient, butternut squash. I know, say WHAT!?!?!


This orange beauty is often overlooked for it's cousin the pumpkin but did you know, you can often substitute butternut squash for pumpkin in recipes? It tastes very similar and it's also cheaper to buy than pumpkin, especially right now as it's in season and super inexpensive!

Today, we made butternut squash cupcakes with a maple cream cheese icing and let me tell ya, it was a hit! The cupcakes are moist and the maple flavor takes the cream cheese icing to a whole new level.


I actually made half a batch of these cupcakes the night before my class as I knew the moms would want to try them. I used my mini muffin pans with success so I added those instructions. If you don't have maple syrup, try adding a 1/2 tsp of maple extract. If you don't have that, no worries, regular cream cheese icing will still taste great on these!

I'll give you a little hint on making those cute little icing swirls. . . it was late evening when I made these & I didn't feel like dealing with my pastry bag and tips so I took a ziploc bag, put the icing in it & snipped a small piece of the corner off, wa-la, mess-free way to dress up the cupcakes!

For those who never made butternut squash puree, what you want to do is cut the squash in half lengthwise, scoop out the pulp & seeds (save the seeds and read down further what I did with them). Place the squash inside face down on a pan & roast for 45-60 minutes at 400 or until the inside is soft. Scoop out the inside & put into a food processor to puree (a blender would also work). Leftover squash can be froze.

Cupcakes
2 cups flour
1 tsp baking soda
1 tsp baking powder
1 tsp salt
1 tsp cinnamon
1 tsp ground ginger
1/4 tsp nutmeg
1/4 tsp cloves
1 cup packed brown sugar
1 cup granulated sugar
1 cup (2 sticks) butter, melted and cooled
4 egg
2 cups butternut squash puree

Frosting
1 package (8 oz) cream cheese room temp
1/2 cup (1 stick) butter room temp
1 Tbsp pure maple syrup
1/2 tsp vanilla extract
3-4 cups powdered sugar to taste

  1. Preheat oven to 350 degrees. Line cupcake pans with paper liners; set aside. In a medium bowl, whisk together flour, baking soda, baking powder, salt, cinnamon, ginger, nutmeg, and cloves; set aside.
  2. In a large bowl, whisk together, brown sugar, granulated sugar, butter, and eggs. Add dry ingredients, and whisk until smooth. Whisk in squash puree.
  3. Divide batter evenly among liners, filling each about halfway. Bake until tops spring back when touched, and a cake tester inserted in the center comes out clean, 20 to 25 minutes, rotating pans once if needed (15-20 minutes if using mini muffin pan). Transfer to a wire rack; let cool completely before frosting
  4. For Frosting:
  5. In the bowl of an electric mixer fitted with the paddle attachment, beat cream cheese and butter together until smooth. Add maple syrup, vanilla, and powdered sugar; continue beating until well combined and smooth. frost cupcakes and drizzle with maple syrup if desired.

Yields 24 regular size cupcakes or 48 mini cupcakes

I am tickled to say I now have a way for you to easily print off this recipe by clicking on Printable Recipe Here!!! As time allows, I will slowly go back over my archived recipes and add a printable link to each recipe.


Bonus! If you clean off the seeds you scrapped from your butternut squash, you can roast them like pumpkin seeds! So while I was working on the cupcakes, I roasted my seeds at 375 for about 20-25 minutes. After rinsing them in water, I let them dry off on a paper towel. Then I sprayed them with olive oil spray & sprinkled on some old bay seasoning & salt (you can use any seasoning, garlic salt, cinnamon/sugar, etc) After about 15 minutes, I tossed the seeds around. And yes, I ate them all up while baking! ;)

Also, stayed tuned for Treasuring Life's Blessings 2nd annual virtual cookie exchange coming up! Starting Monday December 2nd thru Saturday December 7th, come link up your blog posts (new or old) that highlight some of your favorite Christmas cookies, candies or treats. Don't have a blog? That's ok, just stop by to check out the recipes posted. This is a great way to find some new recipes to try out! And feel free to spread the word, the more who participate, the more yummy recipes we'll have!

recipes blog hop


Capture Your Grief- Sunset

Sunset:
 To close this project and this month of Baby Loss Awareness I thought that we could all photograph the sunset from wherever we are in the world.


I saw this sunset from my back porch, barely peeking through the trees. I was in the middle of making supper, but I stopped what I was doing, grabbed my keys & camera and ran out the door with barely a word to the family. I knew I had just minutes to quickly drive around the corner to try and capture this magnificent sunset. This picture doesn't even do it justice. It was breathtaking. 

I sat in the middle of the quiet, abandoned road with my car in park as I tried to capture the beauty of God's hand-painted picture. As I sat there completely alone, I cried for all I was missing. 

My son. 

My Noah.

Oh how my heart still breaks in a million pieces even 3 years later. 3 long years. How can this possibly be? How am I still here, functioning?? I honestly have no idea. I don't know how I got to this point, still standing. Only by the grace of God is all I can figure out. That & a few caring people who have stuck by us.

I still have my days I can barely function. Oh, most wouldn't know anymore around me because I've gotten better at hiding it, or maybe they just don't want to recognize it anymore. It's easier for others to forget my son & my grief.  I think that's more what it is. People think after a few months you should be "all better". I won't ever be, not until the day I die. Blessed are those who realize this & still love me. Still stand by me. Those who ignore or forget my son intentionally, I have no words. I can't imagine treating others like I have been treated by you. May you never experience this gut wrenching ache.

This is a hard, lonely path as I've come to discover. But there have been amazing blessings along the way. Many of which I can't put into words. I've had some amazing people brought into my life because our heavenly babies brought us together. I've learned what true joy means & have a deeper appreciation of life. I've learned to ignore the petty things & embrace who & what truly matters. I have become a better mom to my living children.

All because of Noah.

My dear son, you have taught me a lifetime of lessons in your brief life. I still continue to learn and will until the day I see you again. I love & miss you more than you know!!!

"Blessed are those who mourn, for they will be comforted."
Matthew 5:4

Apologia-Exploring Creation with Chemistry & Physics


When it comes to the world of homeschool science curriculum, we are no strangers to Apologia Educational Ministries. Being that we are in our 9th year of homeschooling, we have used many of their homeschool science resources and have loved each subject we've studied. We heard almost a year ago, that author Jeannie Fulbright was coming up with yet a new volume to add to their science line, Exploring Creation with Chemistry and Physics that was just released this past September. We had the privilege of being amongst the first to receive this brand new curriculum to review.


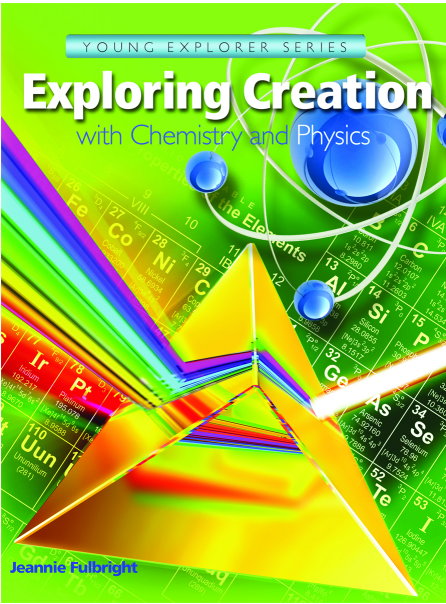
We received both the  textbook and notebooking journal and were pleased as usual with the quality and information presented. The textbook is a hardbound book and the notebooking journal is a spiral bound consumable.  All the curriculum in Apologia's science line are presented with a Biblical worldview which is important to me. There are 14 lessons broken down into 28 weeks. In the beginning of the notebooking journal, there is a schedule broken down exactly how to cover the entire text, when to read certain pages and do the activities in the corresponding journal. Personally, I love any curriculum that breaks down into a well planned schedule for me so all I have to do is implement the lesson plans, perfect for a busy mom!

The topics covered in this curriculum are:
-Chemistry and Physics Matter
-Moving Matter
-Building Blocks of Creation
-Compound Chemistry
-Multitude of Mixtures
-Mechanics in Motion
-Dynamics of Motion
-Work in the World
-Sounds of Energy
-Light of the World
-Thermal Energy
-Electrifying Our World
-Mysterious Magnetism
-Simple Machines

We have the unique opportunity in that our homeschool co-op is offering this course this year as one of their science classes so I have 2 children taking it. How we use this is my kids take a one hour class every Monday. They go over the material they have read the previous week from the textbook and review any homework that was assigned in the notebooking journal. After that, they usually complete projects or experiments that are listed in the book under the "try this" scattered throughout the lessons.

Lava lamps they made in Chapter 1

After Monday, we spend the next 4 days reading the text for the week, completing different pages in the notebooking journal such vocabulary, crossword puzzles, copywork (printing or cursive writing of scripture) or lapbook style mini-books. We've also done some additional experiments my children didn't cover in their co-op class.

This course is already chock full of information and activities but Apologia also included a website address that contains even more extras if you are looking to supplement this course with even more activities. (this is only accessible to those who have the textbook as it is password protected). On the website, the "extras" are broken down by chapter making it easy to find what you want. Some of the things included are extra experiments, videos, detailed explanations and interactive presentations.

Studying salt crystals

You can do this course with just the textbook alone if you didn't have the funds to get each child a notebooking journal (though I highly recommend the journals!) The textbook is written in an easy to understand, conversational tone and makes you feel like the author herself is sitting with you conversing. She takes these challenging topics and presents them in a way for everyone to grasp and understand. There are questions throughout the text that provoke in-depth conversation and make the students really think about the how & why of what they are learning. Like what a polymer is and how it can be reformed into other polymers (where then they made their own bouncy ball). Or how chemical and physical reactions work (they combined mentos & diet coke. . .outside!!!)

I know it can sound overwhelming to do experiments at home but most of the experiments we've done (and the few I've looked ahead at) contain simple components many of which you may already have around the house or other inexpensive ingredients to buy. In the back of the book, there is a list of needed supplies listed by chapter making it easy to know ahead of time what you need to have on hand. 

This was from chapter 4 the class did as a group

The target age for this curriculum is K-6th grade which again, for a busy family that schools many ages, this can be a huge plus. I appreciate curriculum that allows me to include several of my children together. Not only does it save me time, but my kids enjoy working together on projects and experiments. Since my kids are older that are using this, they sat down together and would read the book aloud then do the book work individually.


 While we used the regular notebooking journal this time, Apologia also has a Junior notebooking journal geared for the beginning writer and younger student. They accidently sent us a copy so I had the privilege of looking this over. I admit I never used a junior notebook before but I was quite impressed with it and plan to use it in the future when my little ones reach that age.

Just as we have been with all the Apologia sciences we've used in the past, we were once again pleased with the quality and content of this curriculum and would highly suggest it to any family looking for an in-depth but easy to implement science curriculum. The only minor change I would suggest would be to make the notebooking journal have perforated pages making it easier to tear out for activities as well as ease of use to put into end of year portfolios.

Textbook costs $39

Photobucket

Eggplant Pizza

I admit, today was an exhausting day. But after hearing how many people wanted all of the recipes from class today, I figured this was a good time to document them!!

I had my cooking class make honey garlic grilled eggplant as well as eggplant pizza (a "recipe" I came up with). Eggplant is in season now. Seriously, check out the farm stands near you. I got HUGE eggplant 2/$1.


For the eggplant pizza, peel the eggplant if you aren't a fan of the skin (though it's good for you). Slice into thin slices then sprinkle both sides with salt, laying the slices on towels to absorb the liquid (keeps eggplant from getting mushy, look at the last pic, you can see beads of water). After 10-15 min, blot the excess liquid. Place the slices on a greased cookies sheet with oven set around 425-450. Roast for 10 minutes or so then flip for another 5-10 minutes. Then place sauce, cheese and seasonings on the eggplant. Bake or broil till done till your liking.


A month of gratitude

It's so easy to focus on all the negatives in life so I am sharing a challenge, not just for my readers but myself included. Join me on my blog Facebook Fan Page and share something you are thankful for every day this month. It doesn't have to be anything huge, any little gift of gratitude would be perfect. As we enter this coming holiday season that can often be difficult for many (me included), maybe sharing the things we are thankful will help uplift us all!