Showing posts with label dessert. Show all posts
St. Patrick's Day Treats
Thursday, February 16, 2017
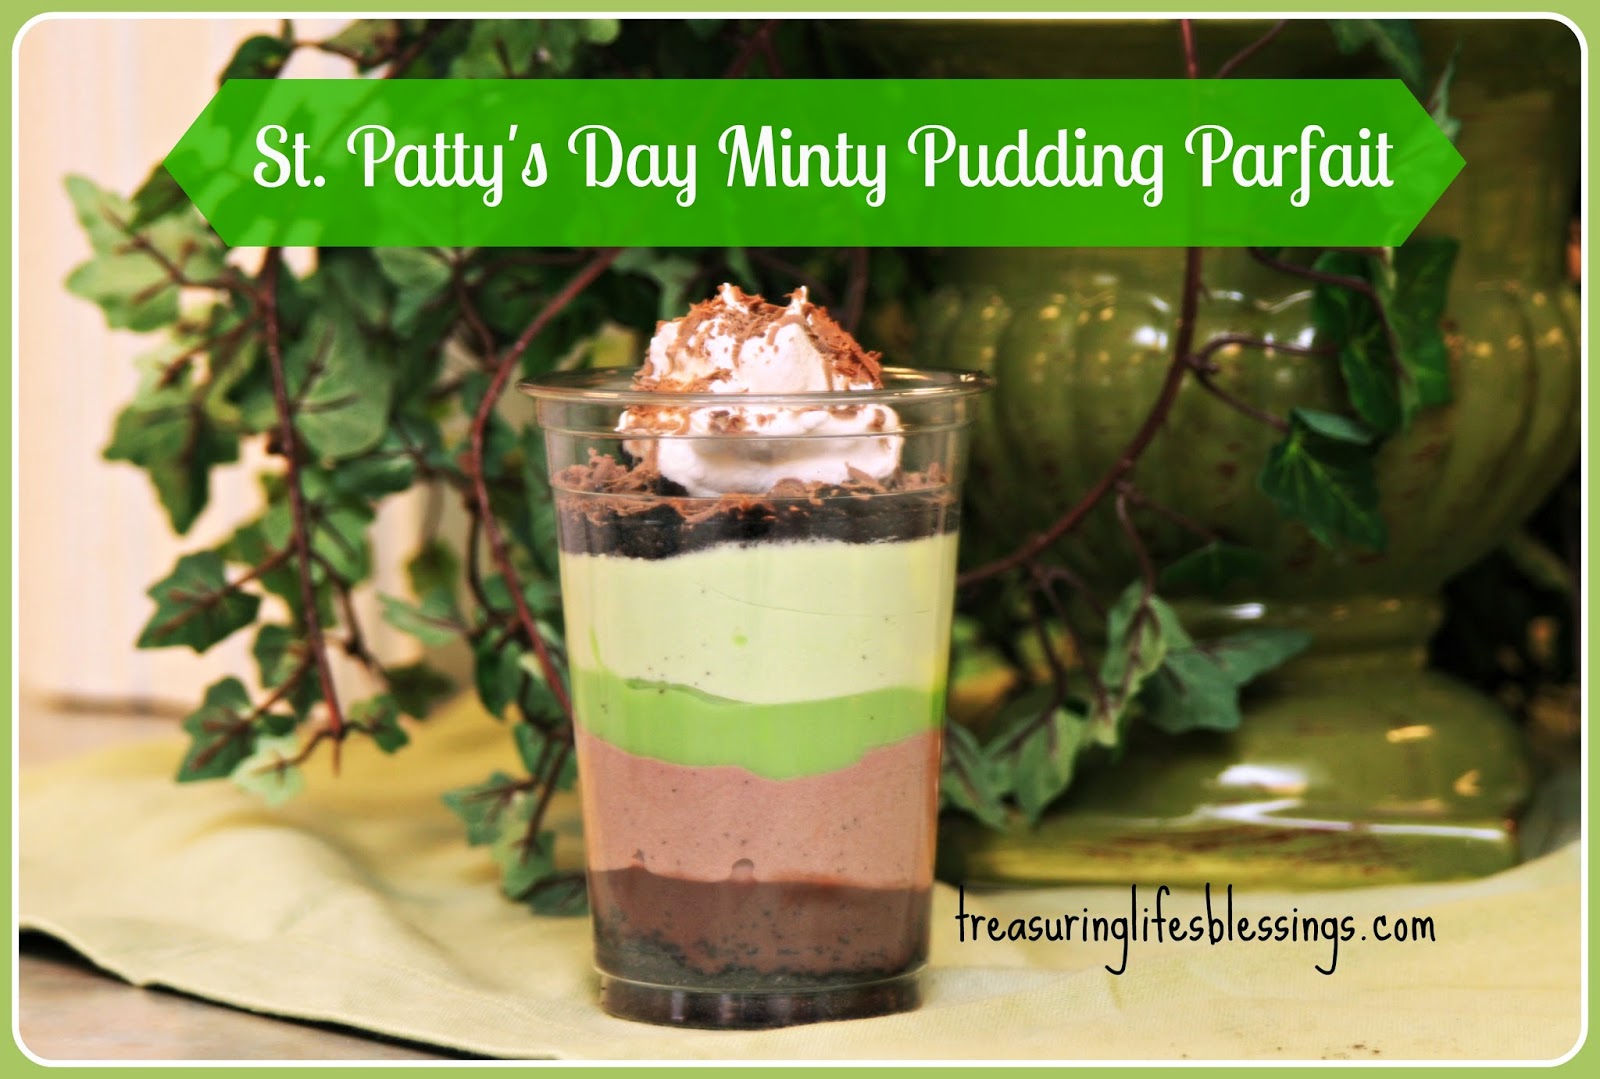
I love making themed food for holidays. One of my more popular desserts for St Patrick's Day is my Minty Pudding Parfaits and Shamrock Pretzels. Both are easy enough to make along with your children!
S'mores Cookies
Thursday, May 14, 2015
With summer in the air, the idea of these cookies came to mind. In fact, I like to bake these in the middle of winter when I am longing for summer nights around a campfire. This one is also a favorite of my kids and they enjoy helping to make them as well. I'm talking about S'mores Cookies!! Soft, gooey marshmallow and chocolate with bits of graham cracker mixed in, all wrapped up in a cookie!

Ingredients
- 1 cup butter
- ½ cup sugar
- 1½ cup brown sugar
- 2 eggs
- 2 tsp vanilla extract
- dash salt
- 1 tsp baking soda
- 1½ tsp baking powder
- 2¾ cup flour
- 1 bag milk chocolate chips
- 1½ cups broken bite sized graham cracker pieces (about 1 sleeve of crackers)
- 1 bag mini marshmallows (you may reserve ½ cup for garnish if desired)
- 2 Hershey’s chocolate bars broken into pieces for garnish (optional)
Instructions
- Preheat oven to 350.
- Cream together butter and both sugars on medium speed for 3 minutes.
- Add eggs and vanilla and continue to mix an additional 2 minutes.
- Add salt, baking soda, baking powder, and flour and mix until just blended.
- Fold in chocolate chips, marshmallows, and graham cracker pieces
- Drop by rounded spoonfuls onto greased baking sheet lined.
- Bake for about 14 minutes or until the edges are just turning golden brown.
- If desired add Hershey bar pieces and additional marshmallows for garnish immediately after removing cookies from oven (If you mix the candy bar pieces in before baking they melt.
Check out more of my recipes!
Rice Krispie Easter Egg Treats
Saturday, March 28, 2015
I thought it would be fun to make an Easter treat we hadn't done before. We turned your typical rice krispie recipe into Easter eggs with a hidden surprise in the middle. You'll also need some plastic eggs (1 per child is fine). If you have any fun spring-like sprinkles or candy decorations, grab those too.


I used the regular rice krispie recipe:
6 c rice krispies (off brand is what we used)
1 bag of mini marshmallows (my bag was 10 oz)
4 Tbsp butter
Melt the butter then add the marshmallows, stirring until melted. Stir in the rice krispies.
From there, I took the pot of goo & put it in the middle of the table with spoons for all the kids to be able to work on this at the same time. The kids had already sprayed their plastic eggs with some non-stick cooking spray so they were ready to go.

We discovered quickly that adding a little crisco or cooking spray to their fingers helped the sticky rice krispies not to stick to their fingers so much.

You want to pack rice krispies into both sides of the egg. If you have any little bits of candy lying around, you could put a piece in the middle. We had been to an egg hunt this past weekend, so the kids had some candy sitting around to use. You could skip this step though.

Once you have both sides filled, push the egg together. You want enough inside that it makes it tough to close but you don't want too much where it won't close at all. The kids would snap the eggs shut, then they opened them back up.

This is what it looked like when they opened it back up. They slide out of the eggs effortlessly.

If you have any sprinkles to add, this is where you want to shake some on. We happen to have some that I got marked down last year after Easter. ;)

Tada! Susan displaying one of her finished eggs!

I think we got a good dozen and a half out of this. The kids had a lot of fun making these cute treats!
Butternut Squash Cupcakes w/Maple Cream Cheese Icing
Monday, November 18, 2013
The theme of the cooking class I teach this semester is entitled "Fresh Foods", meaning the main ingredient I use has to be something in season. Thankfully I live in an area surrounded by farm stands now that my garden is done producing. This week I wanted to change things up and make a dessert using an unusual ingredient, butternut squash. I know, say WHAT!?!?!

This orange beauty is often overlooked for it's cousin the pumpkin but did you know, you can often substitute butternut squash for pumpkin in recipes? It tastes very similar and it's also cheaper to buy than pumpkin, especially right now as it's in season and super inexpensive!
Today, we made butternut squash cupcakes with a maple cream cheese icing and let me tell ya, it was a hit! The cupcakes are moist and the maple flavor takes the cream cheese icing to a whole new level.

I actually made half a batch of these cupcakes the night before my class as I knew the moms would want to try them. I used my mini muffin pans with success so I added those instructions. If you don't have maple syrup, try adding a 1/2 tsp of maple extract. If you don't have that, no worries, regular cream cheese icing will still taste great on these!
I'll give you a little hint on making those cute little icing swirls. . . it was late evening when I made these & I didn't feel like dealing with my pastry bag and tips so I took a ziploc bag, put the icing in it & snipped a small piece of the corner off, wa-la, mess-free way to dress up the cupcakes!
For those who never made butternut squash puree, what you want to do is cut the squash in half lengthwise, scoop out the pulp & seeds (save the seeds and read down further what I did with them). Place the squash inside face down on a pan & roast for 45-60 minutes at 400 or until the inside is soft. Scoop out the inside & put into a food processor to puree (a blender would also work). Leftover squash can be froze.
Cupcakes
2 cups flour
1 tsp baking soda
1 tsp baking powder
1 tsp salt
1 tsp cinnamon
1 tsp ground ginger
1/4 tsp nutmeg
1/4 tsp cloves
1 cup packed brown sugar
1 cup granulated sugar
1 cup (2 sticks) butter, melted and cooled
4 egg
2 cups butternut squash puree
Frosting
1 package (8 oz) cream cheese room temp
1/2 cup (1 stick) butter room temp
1 Tbsp pure maple syrup
1/2 tsp vanilla extract
3-4 cups powdered sugar to taste
- Preheat oven to 350 degrees. Line cupcake pans with paper liners; set aside. In a medium bowl, whisk together flour, baking soda, baking powder, salt, cinnamon, ginger, nutmeg, and cloves; set aside.
- In a large bowl, whisk together, brown sugar, granulated sugar, butter, and eggs. Add dry ingredients, and whisk until smooth. Whisk in squash puree.
- Divide batter evenly among liners, filling each about halfway. Bake until tops spring back when touched, and a cake tester inserted in the center comes out clean, 20 to 25 minutes, rotating pans once if needed (15-20 minutes if using mini muffin pan). Transfer to a wire rack; let cool completely before frosting
- In the bowl of an electric mixer fitted with the paddle attachment, beat cream cheese and butter together until smooth. Add maple syrup, vanilla, and powdered sugar; continue beating until well combined and smooth. frost cupcakes and drizzle with maple syrup if desired.
For Frosting:
Yields 24 regular size cupcakes or 48 mini cupcakes
I am tickled to say I now have a way for you to easily print off this recipe by clicking on Printable Recipe Here!!! As time allows, I will slowly go back over my archived recipes and add a printable link to each recipe.
 Bonus! If you clean off the seeds you scrapped from your butternut squash, you can roast them like pumpkin seeds! So while I was working on the cupcakes, I roasted my seeds at 375 for about 20-25 minutes. After rinsing them in water, I let them dry off on a paper towel. Then I sprayed them with olive oil spray & sprinkled on some old bay seasoning & salt (you can use any seasoning, garlic salt, cinnamon/sugar, etc) After about 15 minutes, I tossed the seeds around. And yes, I ate them all up while baking! ;)
I am tickled to say I now have a way for you to easily print off this recipe by clicking on Printable Recipe Here!!! As time allows, I will slowly go back over my archived recipes and add a printable link to each recipe.

Also, stayed tuned for Treasuring Life's Blessings 2nd annual virtual cookie exchange coming up! Starting Monday December 2nd thru Saturday December 7th, come link up your blog posts (new or old) that highlight some of your favorite Christmas cookies, candies or treats. Don't have a blog? That's ok, just stop by to check out the recipes posted. This is a great way to find some new recipes to try out! And feel free to spread the word, the more who participate, the more yummy recipes we'll have!

Strawberries and Cream Angel Food Cake Roll
Friday, May 10, 2013
Recipe with complete instructions will follow at the end. For now, here's step by step in pictures:

I used my kitchen aid mixer which was a huge help for this recipe but no worries, it can easily be done with a hand mixer. For beating all those egg whites, if you are afraid of your arm falling off while holding your mixer, now's a good time to enlist one of your kids to "help" you out. Just saying!

Beat those egg whites (along with the vanilla & cream of tartar) until you see glossy stiff peaks. Look at those mountains of white reaching for the sky! (hopefully your arm is still in tact if you used a hand mixer).

Using parchment paper, take a sheet & spread it over your cookie sheet then spray with some non-cooking spray. In my cooking class, we used a 15x10 sheet. The one you see above is a bit bigger than that as I realized there is plenty to spread out making it a bit thinner of a roll. Spread that batter out as evenly as you can and bake it at 350 for 15-20.

This is what your fluffy cake should come out looking like. Mine took about 15 minutes and feels soft & springy to the touch. A few of the thin edges browned a bit. That's ok, I wanted that to happen so I had an excuse to cut a few pieces off. The chef (especially a pregnant one) needs a few bites to eat while baking!

Time to whip that heavy cream into submission. Maybe you might want to switch arms this time. Or pick another child to "help"! Once the cream is starting to thicken, you'll add in some vanilla & powdered sugar. Forget that chemical ladden cool whip, this homemade stuff rocks!!

Fold in those delicious strawberries (that yes, one of my kids so lovingly washed & diced for me while I was sneaking bits of the cake I had to cut off. Had to make sure it tasted good first!)

Spread the filling all over your lovely angel food roll. You will have some left over. Now's a good time to decide if you'll hide the leftover filling from the kids so you can eat it later when they are in bed (not that I've ever done that) or use the extra to add a dollup to each piece after cutting.

Carefully roll that baby up jellyroll style. Using a serrated knife with back & forth cutting motions, gently cut into pieces to serve.


Goes wonderful with a cup of tea or coffee! Enjoy!
INGREDIENTS:
For the Cake:
9 egg whites (save the yolks, they make a great pudding or custard!)
1½ teaspoons vanilla extract
¾ teaspoon cream of tartar
1 cup + 2 tablespoons granulated sugar
¾ cup cake flour
1 tablespoon powdered sugar
9 egg whites (save the yolks, they make a great pudding or custard!)
1½ teaspoons vanilla extract
¾ teaspoon cream of tartar
1 cup + 2 tablespoons granulated sugar
¾ cup cake flour
1 tablespoon powdered sugar
For the Filling:
2 cups heavy whipping cream, chilled
6 tablespoons powdered sugar
1 teaspoon vanilla extract
3 cups diced strawberries
2 cups heavy whipping cream, chilled
6 tablespoons powdered sugar
1 teaspoon vanilla extract
3 cups diced strawberries
Powdered sugar, for dusting top of cake (optional)
DIRECTIONS:
1. Place the egg whites in a large mixing bowl; let stand at room temperature for 30 minutes.
2. Meanwhile, line a 15x10-inch baking pan with waxed paper; lightly coat paper with cooking spray and set aside. Preheat oven to 350 degrees F.
3. Add vanilla and cream of tartar to egg whites; beat on medium speed until soft peaks form. Gradually beat in sugar, 2 tablespoons at a time, on high until stiff glossy peaks form and sugar is dissolved. Fold in flour, ¼ cup at a time.
4. Carefully spread batter into prepared pan. Bake for 15-20 minutes or until cake springs back when lightly touched. Cool for 5 minutes.
5. Dust a clean kitchen towel with 1 tablespoon powdered sugar. Turn the cake out onto the kitchen towel. Gently peel off waxed paper. Roll up cake in the towel jelly-roll style, starting with a short side. Cool completely on a wire rack.
4. Meanwhile, in a medium bowl, beat the cream on medium speed until it begins to thicken. Add powdered sugar and vanilla; increase the speed to medium-high and beat until soft peaks form. Gently fold in the strawberries. Store in the refrigerator until ready to use.
5. Unroll cooled cake; spread filling to within ½-inch of edges (you will have some filling leftover). Roll up again. Place seam side down on a serving plate; sprinkle with additional powdered sugar, if desired. Serve with any leftover strawberries and cream filling. Store leftovers, covered with plastic wrap, in the refrigerator.
Check out more of my recipes!
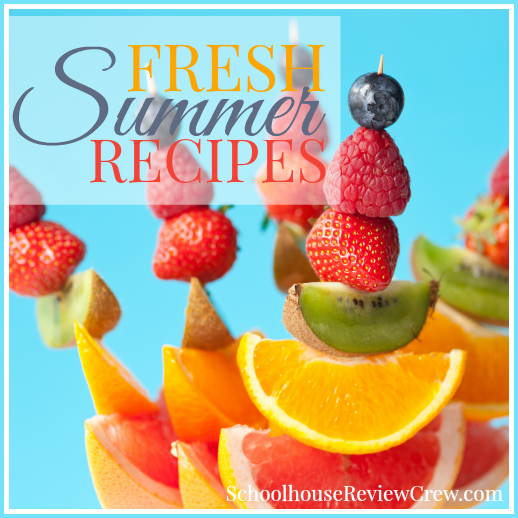
Click the photo below to find more Fresh Summer Recipes!
Apple Snickerdoodle Cobbler
Wednesday, March 27, 2013
I don't know about you but my girls and I love Pinterest and all the ideas we come across. I also like Pinterest for organizing things I come across myself as I surf the net so I can be sure to find them again when I need them. Believe it or not, I've actually made a lot of the recipes I pin. What can I say, I am a recipe junkie & love it!!
A few days ago, Sarah wanted to make one of the recipes we've seen floating around. She's actually made it before but this time we were able to snap some pictures as she wanted to post this & share it with you. Without ado, here's Sarah!
Today i'm going to tell you guys about an awesome dessert,that my family & I love.It's a very simple dessert to make and also tasty. I enjoy to cook & bake anything, you name it.


This is what it looked like after it came out of the oven, it smelled SO good! It's hard to tell in this picture but the cookie topping is so very soft. This would taste good with homemade vanilla ice cream but we didn't have everything on hand to make it.

A few days ago, Sarah wanted to make one of the recipes we've seen floating around. She's actually made it before but this time we were able to snap some pictures as she wanted to post this & share it with you. Without ado, here's Sarah!
Today i'm going to tell you guys about an awesome dessert,that my family & I love.It's a very simple dessert to make and also tasty. I enjoy to cook & bake anything, you name it.

I made a double batch as it doesn't last around here for long. I cored, peeled then sliced up apples into thin pieces.

In the picture above of me, I am mixing up the dough for the snickerdoodles. I rolled them into big balls so they would spread all over then rolled them in cinnamon sugar.


Thanks everyone for reading & let my mom or I know if you try this out!!
Apple Snickerdoodle Cobbler
Cookie Ingredients:
1/2 tsp cream of tartar
1/8 tsp of salt
1/2 tsp baking powder
2/3 c of flour
1/4 c of unsalted butter, softened
1/3 c of sugar, plus 1/2 cup
1 egg
3/4 tsp cinnamon
Apple Ingredients:
8 c of apples (about 6-8 or so)
1/4c brown sugar
1/2 tsp cinnamon
Preheat oven to 350. In a small bowl, combine the 1st 4 dry ingredients for the cookies.In a separate bowl, cream butter, sugar then add the egg. Combine with dry ingredients & mix well.
In a small bowl, combine the 1/2c sugar & 3/4 tsp cinnamon.
Core, peel & slice the apples. Put them in an 8x8 dish and mix well with the 1/4c brown sugar & 1/2tsp cinnamon.
Form 1" balls of cookie dough, then roll in the cinn/sugar mix. Place the coated balls on top of apples. Bake for 40-50 minutes until apples are tender & the cookies are lightly golden.
*the above pictures show a double batch of this recipe in a 9x13 pan.
Subscribe to:
Posts (Atom)