Showing posts with label recipe. Show all posts
Easy Shepherd's Pie (w/roasted garlic mashed potatoes)
Sunday, November 19, 2017
This cold weather we've been having called for a good ole comfort-food recipe this week. I decided to make shepherd's pie with my own twist, I topped it with roasted garlic mashed potatoes. A tasty, one dish meal to fill up those bellies after spending an afternoon playing in the snow. Bonus, you could double this recipe and freeze one dish for a quick meal on a busy night.
Paleo & Gluten Free Buffalo Chicken Nuggets
Tuesday, November 7, 2017
If you are like myself, I am always on the lookout for tried & true recipes that the whole family enjoys. I love cooking from scratch and do so whenever I can. Today's recipe falls in line with not only "from scratch" cooking, but is also Paleo & Trim Healthy Mama friendly AND gluten free!! The bonus?? It was a hit with my kids!! What is it??

Pumpkin Pancakes
Ahhh yes that time of year.....apples, pumpkin in many forms (coffee & cappuccino anyone?) as well cool, fall nights. We've been itching to make some goodies using pumpkin and one of our latest creations was pumpkin spice pancakes. These were a hit with everyone. The pumpkin isn't strong tasting for those who don't like an overwhelming taste of it. The hint of spices rounded out this yummy breakfast and it couldn't be complete without the dollop of whipped cream on top!

Italian Veggie Soup
Monday, October 30, 2017
I love making this over summer because all the veggies this recipe calls for can come fresh from my garden. It's also a warming soup for those cold winter days. This soup freezes well so I will often make a huge batch to have some for a meal, leftovers for lunch and several containers to put in the freezer.


Sugar Cookie Fruit Cup
Thursday, October 26, 2017
Have you ever had a fruit pizza? If you have, this is a similar recipe with a twist. If you haven't, let me briefly explain a fruit pizza.
You take a sugar cookie dough (either homemade or store bought), spread it on a greased cookie sheet or pizza pan, bake it, then top with this yummy "icing" (recipe found below). After that, dice up whatever fruit you desire on top of that. Slice then serve! Super easy!
I wanted to kick up this recipe a notch, so I decided to try & make dessert cups from the dough.

Stuffed Crescent Roll Breakfast Pockets
Tuesday, September 19, 2017
I love playing around with and tweaking breakfast foods. In fact, we enjoy having breakfast for supper which is when I came up with this simple yet delicious recipe.

Spinach and Strawberry Salad w/Poppyseed Dressing
Saturday, April 1, 2017
It's coming up on one of our favorite times in the world of gardening, the ripening of our strawberry patch! In addition to making jam and freezing whole berries for smoothies, we also like this refreshing salad. Combining our strawberries with the spinach from our garden, this salad can easily be thrown together with pecans I keep in the freezer.

I know, the thought of spinach and strawberries together sounds a little odd but even my children love this salad!

Baked Spaghetti
Wednesday, February 1, 2017
Baked spaghetti changes up traditional spaghetti a bit. I like that I can prepare it ahead of time and just pop it in the oven to warm up. It also is a great dish to freeze! In fact, make a double batch one day, have some for dinner that night and put the other half in the freezer for a future meal. I'm all about making things easy when it comes to meals. ;)

Homemade Caramel Popcorn
Wednesday, September 7, 2016
Today's recipe is one I make only for when we go camping. Because let's face it, this isn't exactly one of my healthier recipes. It also makes SO much so it's perfect to take camping to share with all the other families we usually go with. It's become a tradition now that we can't go camping without this tasty treat!

Refrigerator Dill Pickles (aka Claussen Copycat Recipe)
Thursday, August 4, 2016
I've been picking cucumbers from my garden for about 6 weeks now. While I typically can a variety of pickles (spicy bread & butter, dill, old bay pickles, etc) I also like making some refrigerator pickles that we can enjoy almost immediately.


Sweet and Spicy Bacon Chicken Wraps
Saturday, March 5, 2016
Admit it, I had you at bacon, eh? Ha! This is such an easy recipe but boy does it ever taste SO good! I was looking for a new way to make chicken tenders and came up with this. If you just have chicken breasts, those will work as well. You can just cut them up till they are smaller in size like the tenderloin part of the chicken breast.


Money Saving Monday-Preserving Produce & Homemade Oatmeal Packets
Monday, February 15, 2016
This week I want to share 2 tips for the kitchen that can help save you money. There are seriously TONS of kitchen tips I could give you but not to overwhelm this post, I'll share 2 I've used just this last week again.
Have you ever noticed when you buy produce, especially things like berries or grapes, they can get moldy pretty quickly? I don't know about you but I hate wasting food. The other week I got a huge basket (half a bushel) of grapes marked down for only $2.70!! Of course there were a few we had to throw out but for that price, it's no big deal. That's why they were marked down so darn cheap.
Once we got home, the kids sat down to sort out the grapes & pull them off the stems. From there, I filled one side of my sink with cold water (after cleaning it good with my homemade cleaner.) Then I added some vinegar to the water.
Why you may ask?
Cauliflower Pizza Crust
Saturday, November 21, 2015
Say WHAT?!?! Oh yes I just went there, a totally gluten free pizza that rocks!! Since cauliflower is in season right now and super cheap at the local farm stands, I've been finding myself experimenting with it lately. Cauliflower is becoming more versatile like zucchini.


Philly Cheesesteak Stuffed Peppers
Tuesday, September 8, 2015
As the gardening season is winding down, I feel like a squirrel frantically gathering nuts to store for winter time! I've been in freezing & canning mode again lately. I had a ton of peppers, zucchini, broccoli & cabbage to do up. While I've been freezing a lot of the veggies plain to use over winter time, I also wanted to try some new recipes.

I happen to have gotten some roast beef lunch meat in the marked down area of the deli. I love this section as I can often find the more expensive lunch meats that are either sliced too thin or are the chunked up ends for only $1.99lb (otherwise, roast beef is NOT a staple in our house! lol)
As I looked at the roast beef & peppers, I thought that a Philly Cheesesteak Stuffed Pepper sounded like a good idea. It wasn't until I started cooking that I realized this was going to turn into an awesome recipe so I quickly dug out my camera to snap some photos so I could share the recipe with y'all! Let me just say the photos don't do this recipe justice! The kids and I absolutely LOVED these and the next time I get some cheap roast beef, we will be making this again!! A bonus is that this is gluten free and low-carb!
I started off sauteing chopped up mushrooms, onions & garlic. Once they were nice and ccaramelized I added in the sliced roast beef.
I sliced 2 whole peppers in half and took out the seeds. You can use any kind of cheese you prefer but I used a slice of pepper jack and laid it in the bottom of the pepper half.
I divided up the meat mixture evenly between all 4 peppers then laid a piece of cheddar cheese on top.
I popped the peppers in the oven and baked them for about 15-20 minutes.
YUM!!!
If you are looking for another stuffed pepper recipe, check out my Mexican Stuffed Peppers with Quinoa & Black Beans!
Philly Cheesesteak Stuffed Peppers
about 1/2lb of roast beef lunch meat sliced into strips
8 slices of cheese
2 whole peppers cut in half
2 Tbsp butter
1 medium onion sliced
6oz of mushrooms sliced
2 cloves of garlic minced
salt & pepper to taste
In a saute pan, saute the mushrooms,onions & garlic until caramelized. Add the strips of roast beef & toss with the veggies. Cook for about 5-10 minutes. Lay a piece of cheese inside each pepper then evenly divide up the meat between them. Cover the meat with another piece of cheese. Bake in the oven at 400 for 15-20 minutes.
Zucchini Lasagna
Friday, June 19, 2015

I've had a hankering for a good ole lasagna but I have been doing good in not consuming unnecessary sugars and carbs lately. (in doing some reading & research, our bodies are meant to eat the way God created earth, raw & natural). Now with that in mind, I have always eaten healthy. I don't have a sweet tooth and watch portions sizes but there were still adjustments I could make to be even healthier. Wouldn't ya know it, as I easily switched things up, 7 pounds melted off of me in no time (and I don't have much to lose but was thankful that came off effortlessly).
Anyway, I've used zucchini in recipes before as a substitute so I figured changing up my previous lasagna would work pretty well. So I was excited to give this a chance. I didn't have a recipe to follow. I just knew to slice the zucchini (from my garden) in thin, long slices. Then to sprinkle it with salt to draw out excess water. I then let it sit in a colander for awhile as I worked on the rest of my prep.

After it sat for awhile, I rinsed it then blotted each slice dry. Then I tossed the slices on the grill for about 3 minutes each side, enough to give a nice grill mark & add a bit of firmness to the slices. From there, I made my lasagna just like I would with noodles except I substituted the zucchini for the noodles. I did make a small pan of "regular" lasagna" for Kevin in case he didn't want to eat this kind.
I was so busy prepping it, I forgot to take pics as I was assembling it. But here is a quick shot of it from the side. If you truly wanted to make the zucchini look like noodles, then just trim the skin so you don't have any green showing. I knew we wouldn't care and it's some extra nutrients with the skin on.

I baked it like I would my usual lasagna. At the end, I pulled off the foil and added a bit more cheese to the top to finish baking.
Let me just say, what.a.hit!!!!! I couldn't believe how quickly this pan got devoured! In fact, I was pleasantly surprised Kevin even ate some of this and he said it wasn't too bad! Thankfully he has come far from the bland food he grew up with in the almost 14 years we've been married!
Not the greatest pic but I tried to quick take one before it got scarfed up! I am SO making this again!

In fact, this was the 3rd "new" recipe I've made in the last 2 days. Stay tuned for more new recipes in the coming days (all from my garden!)
I learned that courage was not the absence of fear, but the triumph over it. The brave man is not he who does not feel afraid, but he who conquers that fear.
-Nelson Mandela
-Nelson Mandela
Be strong and courageous. Do not be afraid or terrified because of them, for the Lord your God goes with you; he will never leave you nor forsake you.”
Deut 31:6
S'mores Cookies
Thursday, May 14, 2015
With summer in the air, the idea of these cookies came to mind. In fact, I like to bake these in the middle of winter when I am longing for summer nights around a campfire. This one is also a favorite of my kids and they enjoy helping to make them as well. I'm talking about S'mores Cookies!! Soft, gooey marshmallow and chocolate with bits of graham cracker mixed in, all wrapped up in a cookie!

Ingredients
- 1 cup butter
- ½ cup sugar
- 1½ cup brown sugar
- 2 eggs
- 2 tsp vanilla extract
- dash salt
- 1 tsp baking soda
- 1½ tsp baking powder
- 2¾ cup flour
- 1 bag milk chocolate chips
- 1½ cups broken bite sized graham cracker pieces (about 1 sleeve of crackers)
- 1 bag mini marshmallows (you may reserve ½ cup for garnish if desired)
- 2 Hershey’s chocolate bars broken into pieces for garnish (optional)
Instructions
- Preheat oven to 350.
- Cream together butter and both sugars on medium speed for 3 minutes.
- Add eggs and vanilla and continue to mix an additional 2 minutes.
- Add salt, baking soda, baking powder, and flour and mix until just blended.
- Fold in chocolate chips, marshmallows, and graham cracker pieces
- Drop by rounded spoonfuls onto greased baking sheet lined.
- Bake for about 14 minutes or until the edges are just turning golden brown.
- If desired add Hershey bar pieces and additional marshmallows for garnish immediately after removing cookies from oven (If you mix the candy bar pieces in before baking they melt.
Check out more of my recipes!
Rice Krispie Easter Egg Treats
Saturday, March 28, 2015
I thought it would be fun to make an Easter treat we hadn't done before. We turned your typical rice krispie recipe into Easter eggs with a hidden surprise in the middle. You'll also need some plastic eggs (1 per child is fine). If you have any fun spring-like sprinkles or candy decorations, grab those too.


I used the regular rice krispie recipe:
6 c rice krispies (off brand is what we used)
1 bag of mini marshmallows (my bag was 10 oz)
4 Tbsp butter
Melt the butter then add the marshmallows, stirring until melted. Stir in the rice krispies.
From there, I took the pot of goo & put it in the middle of the table with spoons for all the kids to be able to work on this at the same time. The kids had already sprayed their plastic eggs with some non-stick cooking spray so they were ready to go.

We discovered quickly that adding a little crisco or cooking spray to their fingers helped the sticky rice krispies not to stick to their fingers so much.

You want to pack rice krispies into both sides of the egg. If you have any little bits of candy lying around, you could put a piece in the middle. We had been to an egg hunt this past weekend, so the kids had some candy sitting around to use. You could skip this step though.

Once you have both sides filled, push the egg together. You want enough inside that it makes it tough to close but you don't want too much where it won't close at all. The kids would snap the eggs shut, then they opened them back up.

This is what it looked like when they opened it back up. They slide out of the eggs effortlessly.

If you have any sprinkles to add, this is where you want to shake some on. We happen to have some that I got marked down last year after Easter. ;)

Tada! Susan displaying one of her finished eggs!

I think we got a good dozen and a half out of this. The kids had a lot of fun making these cute treats!
Harvestland Review- Sweet & Spicy Bacon Chicken Wrap Recipe
Friday, February 13, 2015
I was recently given a chance to try out Harvestland Brand Products thanks to Moms Meet. Ya'll know I love to cook as well as serve my family healthy food so we were excited to try out their chicken knowing it's antibiotic free as well as organic! I was encouraged to come up with a new recipe using their products which you will find down below.


I had never used Harvestland products before so I wasn't sure how easily I'd be able to find them. I was pleasantly surprised to find them at Walmart, Giant and my local non-chain grocery store, although I could only find some of the chicken products & ground turkey. I hadn't seen any pork products or their fully cooked deli meats. We tried out their chicken thighs, boneless skinless chicken breasts & tenderloins. I have to say we could tell a difference between this chicken and the typical variety we purchase. We thought that this chicken was more tender & had a lot more moisture once it was done cooking.

We used the chicken to make bbq chicken on the grill using my favorite powdered bbq seasoning. Chicken thighs & legs can take awhile to cook on the grill thus resulting in dried out chicken. My secret to getting juicy, flavorful bbq chicken is to cook it in the oven first, covered with foil. Then place out on the grill to crisp up the skin while adding the bbq seasoning to it. It literally falls off the bone and tastes SO good!


Just the facts:
•All chickens are raised on family farms with very strict USDA Process Verified programs, which ensures that the chickens are fed all-vegetarian diets with no animal by-products, raised cage-free, and are never given any antibiotics, ever.
•Raised to the same standards as their chicken, HARVESTLAND® turkeys are fed an all-vegetarian diet with no antibiotics, steroids or hormones.
•Pork is the latest addition to the HARVESTLAND® brand. Their hogs are raised on family farms in the Midwest and are also fed an all-vegetarian diet with no antibiotics, hormones or steroids.*
•Harvestland also offers USDA-certified organic chicken. These chickens are raised without antibiotics on free-range, organic farms and are fed an all-vegetarian diet of certified organic ingredients.
•The HARVESTLAND® product line includes fresh chicken, turkey, and pork products, as well as a variety of fully-cooked refrigerated, frozen, and deli meats. Prices vary based on the retailer.
I had never used Harvestland products before so I wasn't sure how easily I'd be able to find them. I was pleasantly surprised to find them at Walmart, Giant and my local non-chain grocery store, although I could only find some of the chicken products & ground turkey. I hadn't seen any pork products or their fully cooked deli meats. We tried out their chicken thighs, boneless skinless chicken breasts & tenderloins. I have to say we could tell a difference between this chicken and the typical variety we purchase. We thought that this chicken was more tender & had a lot more moisture once it was done cooking.
It was dark when I was grilling hence the dark photo.
We used the chicken to make bbq chicken on the grill using my favorite powdered bbq seasoning. Chicken thighs & legs can take awhile to cook on the grill thus resulting in dried out chicken. My secret to getting juicy, flavorful bbq chicken is to cook it in the oven first, covered with foil. Then place out on the grill to crisp up the skin while adding the bbq seasoning to it. It literally falls off the bone and tastes SO good!
Grilled BBQ Chicken
I used the chicken tenderloins for 2 other recipes. I marinated and chunked up some to grill on skewers that I then turned into grilled chicken salad with homemade ranch dressing. This is one of my kids favorite suppers. They also like it served with homemade honey mustard dressing.
Grilled Chicken Salad
And now for the new recipe I made. . .
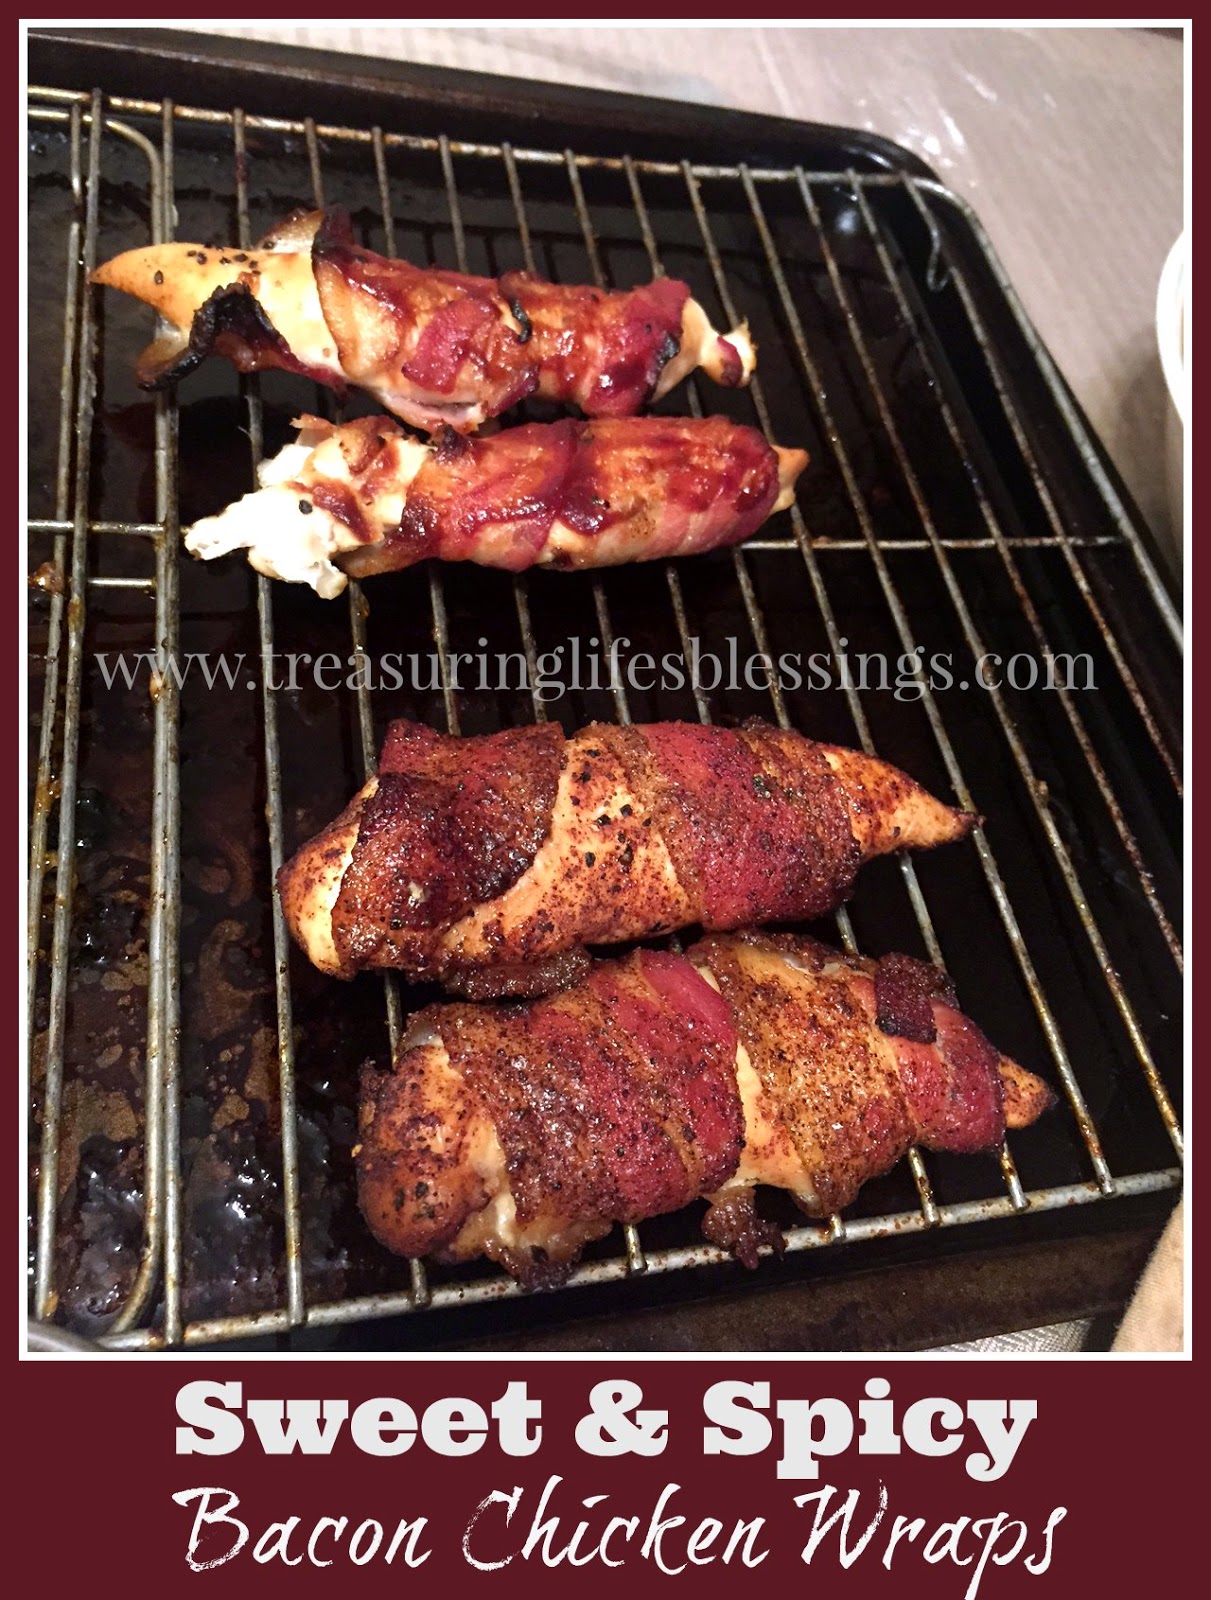
Sweet & Spicy Bacon Chicken Wraps!
Lay cooling racks on a cookie sheet that has an edge on it. (This allows for air to get the whole way around the bacon so you don't end up with soggy bacon after it's baked.) Wrap a piece of bacon around each tenderloin.
In a bowl, mix together 2/3 cup of brown sugar with 2 Tbsp of chili powder. Take each bacon wrapped tenderloin and roll around in the mix until well coated. For some of our bacon wrapped tenderloins, I put bbq sauce on instead of the mix.
Bake at 350 for about 35 minutes or until cooked & bacon crispy.
We devoured this chicken so fast I almost forgot to take a photo of the finished product before it was almost gone! We couldn't decide which seasoning we like better with the bacon wrapped tenderloin as both ways were awesome! You can find the printable recipe here.
For more recipe ideas on how to use Harvestland chicken, check out my recipe page.
Connect with Harvestland on:
I received this product for free from the sponsor of the Moms Meet program, May Media Group LLC, who received it directly from the manufacturer. As a Moms Meet blogger, I agree to use this product and post my opinion on my blog. My opinions do not necessarily reflect the opinions of May Media Group LLC or the manufacturer of this product.
Gluten Free Cheddar Biscuits (like Red Lobster!)
Monday, December 15, 2014
Many in our household have gone gluten free due to health issues and thankfully it hasn't been too much of a transition. We typically eat a whole foods diet anyway thanks to our garden we grow every year. I can & freeze our produce and cook most things from scratch, all while avoiding processed food.

Even still, there is always that longing for a delicious, warm roll or slice of bread. Thankfully, I've come across some great recipes using coconut flour, almond flour & flax meal, all of which are gluten free (and so much better for you than white flour!)
I was ecstatic the other day to try a new recipe that claimed it tasted just like Red Lobster's Cheddar Bay Biscuits. If you have ever eaten at Red Lobster, their endless biscuits are to die for! They are warm, soft & melt in your mouth. BUT if you have issues with gluten, they are a HUGE no-no!
I am here to tell you, after I tweaked the recipe a little, the result was a biscuit that tastes almost IDENTICAL to Red Lobster's mouth watering biscuits and yes, they are GLUTEN FREE!!! YAY!!! I even gave a bite to my picky eating husband and he assumed it came from Red Lobster! Score!
Also, double bonus, if you follow Trim Healthy Mama, these biscuits would be an S.
Ok ok, I'll shut up now and give you the recipe!
Ingredients:
- 3 eggs
- 1/3 cup of coconut flour
- 6 oz sharp cheddar cheese
- 1/3 cup butter, melted (1 tablespoon reserved for brushing after)
- 1 teaspoon of garlic powder
- 1/4 teaspoon baking powder
- pinch of salt and pepper
Instructions
- Preheat oven to 400 degrees F.
- In a mixing bowl, combine coconut flour, baking powder, garlic powder, salt and pepper.
- In a separate bowl, whisk together eggs and butter until evenly distributed.
- Slowly incorporate the wet ingredients into the dry and mix until there are no lumps.
- Fold in the cheese.
- Drop spoonfuls of the batter onto a greased cookie sheet. (I made 9 biscuits)
- Bake for about 13 minutes until the edges of the biscuits are brown and the tops are golden.
- Brush top with additional melted butter out of the oven.
This post may contain affiliate links. Any purchases made through these links help bless our family and doesn't cost you a thing!
Pumpkin Pretzels
Friday, October 10, 2014
Ah fall is definitely in the air and with it, comes the fall crafts and food. I came up with a fun and easy project in the kitchen to do with the kids. We made pumpkin pretzels!! (no, they do NOT taste like pumpkin, they just look like pumpkins!)

Ingredients:
mini pretzels
green M&M's
a bag of white chocolate chips
1 Tbsp of shortening
food coloring
Lay a piece of wax paper on a cookie sheet. Place your white chocolate chips into a microwave safe dish with the shortening. Microwave 30 seconds at a time, stirring after each time. Do this until the chips are melted. Add food coloring to achieve orange color (this is a mix of red & yellow). Dip pretzels in the orange-colored chocolate then lay on the cookie sheet. Place an M&M at the top of the pretzel for the "stem". Once you have your dipping done, place the tray of pretzels in the fridge to harden up.
I also have other holiday inspired pretzels! Check out my Shamrock Pretzels and Santa Hats!
Subscribe to:
Posts (Atom)