The Homegrown Preschooler


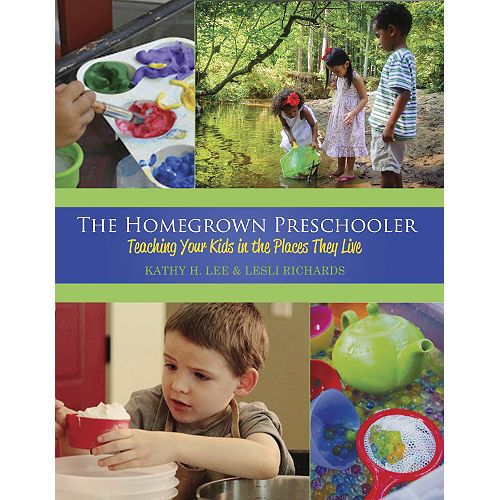
As we just started our 9th year of homeschooling, I've looked back evaluating how far we've come. One thing I wish I would've known with my older children is how I could've had a head start in homeschooling during the preschool years. Sure, they learned things but I can't say I was always intentional about it as I was just trying to keep my head above water. Enter The Homegrown Preschooler: Teaching Your Kids in the Place They Live from Gryphon House.

This is a 200 page softcover book by authors Kathy Lee & Lesli Richards who openly share their journey of homeschooling. They start off with an intro about themselves and why they chose to keep their kids at home. Between them, they have 12 children including adopted & special needs kiddos which they also share about in this book. The book contains not only chapters but snippets of ideas in the columns as well as many colored pictures throughout the book.

The 9 chapters include:
- Homeschooling- harvesting a bountiful life
-Learning through play
-Sowing the seeds-preschool learning
-Setting the stage
-Home life=learning- slow down and teach
-Who has time for this?
-Organizing it all
-Days and seasons that don't fit in the box
-Special circumstances

After the 9 chapters is a section of the book called "Activities" that contains a variety of ideas to incorporate learning with your preschooler. It covers learning through home life, science, gross motor & fine motor, math, language & emergent literacy, & art. There are silly songs, recipes for playdough and other sensory suggestions, field trip ideas, recipes for simple food your preschool can help you prepare, even instructions for making your own light table.

It's so easy to get caught up thinking that we need a formal curriculum for teaching our kids when in fact, it's quite the opposite. This book was a great reminder of that. Olivia is now counting to 8 because we are always counting out loud as we eat pieces of food, walk up steps, etc. Just to be clear, this book is not a workbook for your preschooler but a book of ideas for a parent to implement with your preschooler.

One of my favorite sections of the book was where they suggested the use of "novelty bins" and baggie-on-the-go ideas. A novelty bin is meant to pull out when you need to keep your preschooler busy while making a phone call or working on school with an older child (moon sand for example). The baggie on the go is a developmental activity you can grab to take with you on errands to occupy your preschooler (like pipe cleaners & beads). While Olivia is still pretty young as she only just turned 2, I plan to use many of the suggestions this book offers in the coming months.

Yes, many ideas in this book are simple things that as you read it you say to yourself "oh yeah, I forgot about that". But if you are like me, having a reference for ideas right at your fingertips is handy. Being a busy mom, it's so easy to overlook the youngest in the family though this book is a good tool for helping you be more intentional in incorporating learning through everyday activities. I look forward to taking the time to do more learning activities with her that I hadn't done with my older kids.

You can purchase this book for $29.95

Photobucket

A thank you & Noah's painting

Well, I fell off the bandwagon and missed a few days of my 31 day blog challenge. I knew it would be a stretch for me considering it was during the month of July, the hardest month for me to live through anymore with Noah's birthday & anniversary of his death during this month. I was hanging in there but then my grandpa died last weekend and what little rope I was clinging onto to get through this month, snapped. I had already been reliving so many memories of this time frame with Noah, that grandpa's death really brought to surface even more emotions I had been trying to suppress. Especially because I am so close to my grandma, my heart just aches for her.

So I missed some days of posting and only did what I needed to which happened to be a few reviews that were due. Such is life, we set goals but sometimes God has a different path and we just need to roll with it, and rolling with the punches is something I have been learning these last few years.

I also just wanted to give a huge thank you to those who have been sending me messages, texts, calling and offering up prayers these last few weeks. I am so thankful that many of you realize what a bittersweet month this is for us. I very much appreciate those of you who acknowledged Noah's birthday as well!!!! It saddened me that those who should've acknowledged his birthday didn't, but it reminds me to focus on those that do care and remember and be grateful for these dear people.

And if you think I'm just being overly sensitive, please, please go read this article on what this babyloss mom shares. She shares many good things but just to highlight one of her statements:
If you chose to acknowledge my daughter’s birthday or the anniversary of her death on the first year, it’s terribly gut wrenching when you didn’t bother to acknowledge the second or third or fourth. Do you think any subsequent birthday or anniversary is not as sad for me?

She hits the nail on the head not only with birthdays but everything else she writes I totally relate 100%!

-I’ve been left repeatedly heart broken as friends that I truly loved and never thought would walk away from me tossed me into the too hard basket or – more hurtfully – the crazy basket

-It’s been on going to get my friends and family to understand what it’s like to walk in my shoes. I’m angry about that. When I should have been grieving, I was defending myself.

- I  personally know though, if I found out a family member or friend had been diagnosed with an illness or disease, or worse, their child, I would be on Google immediately finding out more about it and how I could help them the best. So why is it that this doesn’t seem to apply with the death of a child?

 I'd encourage you to read what she wrote and maybe you can get a glimpse into my thoughts from another perspective. The only way we are going to break the silence & misinformation on infant death and grieving is by educating those around us.

Several months ago, a dear friend who has been along on this journey from day one, blessed us with an amazing gift. She had a given a friend of hers a few photos of Noah and I and this talented friend painted a picture of Noah & I. This photo doesn't do it justice, it's simply breathtaking!!!!


Thank you again Shannon for this amazing gift!! We will always treasure it and think of you when we look at it!!

I haven't forgotten about the sky lantern video of babies names. With everything going on in the last week, it just took a back seat but I will be working on it as I get a chance. It was so great to be able to remember so many other babies as we celebrated Noah's life.

Thanks for bearing with me. I am starting to see this grief fog lifting and am working on getting back on track one step at a time!

KidCoder Visual Basic


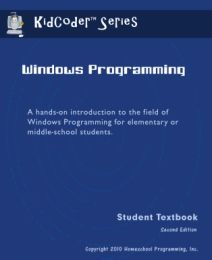
We recently had the chance to review KidCoder Visual Basic Series from Homeschool Programming. This program was created by a homeschooling couple who has a combined 17 years experience in the field of software industry. They found that there weren't any courses out there for kids or teens that taught computer programming, thus Homeschool Programming was born.

KidCoder VB is a year long programming course broken down into 2 semesters. It is geared for 6-8th grade students. The first semester covers windows programming with the second semester covering game programming. Both courses include the student activity text, tests and answers as well as a solution guide (which comes in handy if you struggle with a programming error, you can see just how the code is supposed to look.) Prior to starting this course, your child should have a basic idea of how to open programs, how to save & retrieve them, basically just simple computer skills. Everything else is taught along the way. The student text for Windows Programming has over 200 pages and contained 14 chapters which contained 3-5 lessons each.

The 14 chapters cover:
Introduction to computer hardware, software and programming history
Using the Microsoft Visual Basic 2010 Express development environment
Managing numeric and text data
Making decisions about program flow
Obtaining and validating user input
Working with numbers and math operations
Working with strings (text)
Learning how to debug (find errors in) your code
Learning how to write loops to execute sections of code many times
Working with arrays (sets of data)
Publishing your programs to other computers
Putting it all together – write a simple graphical game!

As part of this curriculum, you need to download Visual Basic 2010 Express, which you can download for free from Microsoft (and the book walks you through this). This is the basis from which you practice on for this course. During windows programming, the student learns to write basic code and perform other basic programming tasks.

There is also the option to buy instructional videos on DVD which is great for the visual learner or those who want reinforcement of the text (though they do not replace the student text). The videos were similar to a powerpoint presentation and we liked how they showed us specific steps while talking us through them.
(a screen shot of one of the videos)


Each lesson walked you through step by step of the actions they wanted you to do. They also provided colorful pictures showing you what the screen would look like as you do the different commands. So if you didn't purchase the videos, you still have a good visual in the text.

(a screen shot of a page of text from the PDF student workbook)

At the end of each chapter, the workbook has a "Your Turn" section where you get to practice on your own what you just learned without the helps & hints. It gives you a chance to see just how much you remember. 

(a screen shot of a box we created)

Each chapter gets progressively more challenging and works towards teaching the skills to build your own  Pong game at the end. The first semester lays the foundation for the second semester which is KidCoder Game Programming. Just like the first semester course, this course offers a student text as well as instructional videos. We didn't get to this course but glancing at it, the students learn game design, images and animations, drawing text and animation eventually culminating in creating their own game.

While my kids and I aren't huge into programming (that's hubby's expertise), we found this course to be very informative and thorough. They walked you through each lesson in small pieces and since it's self directed, you could take as much time as you want to go through this course. For us, we needed a bit more time for each lesson as it is a lot to take in.

There are different pricing options:

KidCoder: Windows Programming or Game Programing- course only- $75
KidCoder: Windows Programming or Game Programing- course & video- $85
KidCoder: Windows Programming or Game Programing- video only- $20

Or both the full year (both semesters)-
KidCoder VB Year Pack- course only- $120
KidCoder VB Year Pack- course & videos- $145
KidCoder VB Year Pack-videos only- $30

Photobucket

Christi the Coupon Coach


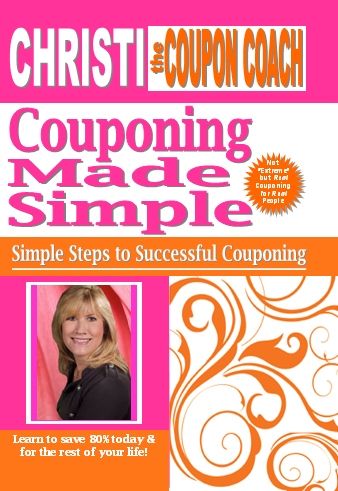
If you've followed me here at TLB for any length of time, you know how much I love a good bargain and occasionally share my Money Saving Monday tips. So when the chance came up to review Couponing Made Simple by Christi the Coupon Coach for the Molly Crew, I was excited to check it out. I wanted to see if she shares anything that I wasn't already doing. While it turns out, I didn't learn anything new I was thrilled to see she shares everything that I do on a daily basis and it just confirmed to me I am doing everything I can to save my family money.


This is a 123 page book with a few pages in the back to jot down your own notes. I found the book an easy read during an afternoon. As I read her book, I felt like I was sitting with a friend over coffee chatting. She presents her ideas, methods & suggestions in an simple to understand format so even if you are brand new to couponing and deal finding you won't feel overwhelmed. She also includes black & white photos which further help the reader to understand just what she is talking about. Plus, who doesn't like to see a picture of just what all you can get for very little money!

The 10 chapters in the book cover:
Success Stories
A New Way to Shop
The Language of Couponing
Organization System
Step-by-Step Process
Tips & Tools
Couponing Ethics
Networking & Communicating
Bonus Section
Beyond Couponing

I know we all hear stories of extreme couponing but that's not what this book is about. It shows how the average person can save on everyday items. I do realize that finding deals can vary by region such as when she mentioned she can buy newspapers that have coupons for $.50 or a $1 so she buys multiplies of them, I can't find that around here. But what I do is I paid for a years subscription for the Sunday news that only cost me $.85 a month if I paid for the subscription up front. I don't think I could've gotten more than one for that price though. Once in a great while if I know there is a really good coupon in the paper, I will buy another one in the store as long as I know what I will save is more than the cost of the paper. I also ask others around me for their coupons, even if they cut some out themselves often there are still some in there I can use. (this is where networking comes into play at).

Ok, so let's say you have a stack of coupons in front of you and you don't know what to do next, Christi shares with you ideas on how to organize them. It's honestly a personal preference and maybe if I got many multiples of coupon inserts each week, I might do the file method as she explains. Instead, I use a 3 ring binder with plastic inserts that I take with me into the stores that contain all my coupons. My reason for this is because many times I find unadvertised deals or "mark downs" in the store so I prefer to have all my coupons at my fingertips ready to nab anything I find.


So now you organized your coupons, Christi then explains the next step of how to find the deals in your nearby stores by using the internet or store circulars you received in the newspaper. While she doesn't list any particular sites in her book because of websites always changing, she does have a list of her favorite match-up websites on her own site that she keeps up to date.

Just to give you a visual of what sort of things you can get for nearly free by following her methods in the book, here are some photos of things I've gotten in the past that I've shared about before.

 All of this for $9.22, saving $95.78 


All of this for $.41!!!

Christi not only shares how to coupon in her book but also other tidbits of information as well such as yard saling, thrift stores, even ways to think outside the box  (like if you get free baby food, use the fruit kind to toss into smoothies. Yup, I've done that before too!)

Honestly, it doesn't take me long at all to save this kind of money. I mainly stick with CVS as it's only 2 miles down the road from me. If I sat down & figured out how much I saved vs the time it took me to cut the coupons & match the deal, I'd find myself making a lot of money per hour. Trust me, as a homeschooling mom of 7 kids I don't have tons of spare time and Christi also shares that she doesn't spend hours chasing deals either.

If you are new to couponing, this would be a great resource to get you started in understanding how to best maximize your savings! Christi the Coupon Coach - Couponing Made Simple is available for $18 for the book or $4.99 for the kindle version. Check out the link for a glance inside the book!

Photobucket


Picaboo Yearbook

Pictures.... I love taking them BUT I am so bad about printing them out. I literally have thousands & thousands of photos as I enjoy photography. I print a few out here & there or make video montages. I'm all about anything digital so I was thrilled to recently have the opportunity to review Picaboo Yearbook. I had the privilege of putting together my own 20 page softcover yearbook.

The hardest part for me of this whole process was figuring out what photos I wanted to include and to decide how to lay everything out.

To start, I set up an account and plugged in some basic info for my yearbook. I saw there were some tutorial videos so I watched just a couple, enough to grasp the general idea. Most of the process was easy to figure out with some trial and error.

From there, I played around with backgrounds trying to decide what I wanted for my cover. There are countless background options not only for a cover but for the whole book as well or you could even upload your own.
(click on photos to enlarge)
This is a photo of the back of the book (the front has our last name on which is why I am not showing that side)

After that, I started figuring out what photos I wanted and uploaded them. Since I was doing a 2012-2013 school year, I started looking in my September 2012 photo folder and just kept going forward one by one selecting photos. We have a cable internet connection and I felt the pictures uploaded in a decent amount of time, especially considering the file size of my photos as I use a camera with 18 megapixels.

I then started a "section". Rather than have tons of photos to sort through, you can name a section and select how many pages you want in that section then move specific photos to that section making it easier to find what pictures you want.


I will say the only part that was frustrating was the whole sections thing. Once you selected how many pages you wanted in a section and started working on it, you couldn't edit the number of pages. I would estimate how many pages I wanted in a section but as I started laying out my photos onto pages, I realized I wanted to adjust how many pages I used and I couldn't do that. So then I'd have to start a whole new section and move photos to the new area. Not a huge deal but I'd love to be able to edit the amount of pages you can assign to a section. I just kept adding on sections and didn't bother naming them (though you can assign a specific name and you also can move sections around if you want them in a different order after laying them out).


The options are endless and you could spend many hours working on a project like this. There are hundreds of background to chose from, many with patterns but also solid colors. You could also use your own photo as a background that takes up the whole page. There are pre-made layouts where all you have to do is drag & drop your photo into the spaces or you could manually layout your own photos, I did some of both. Even if you use a premade layout and there is a spot you don't want a photo you could delete that spot. You can also add text in different fonts, anything from a few words to a paragraph or more. There are also "stickers" too.


Just to highlight some of the features of this yearbook program:
-no minimum orders or deadline times
-3 week or less turnaround time (I received mine in a week)
-free shipping for orders of 50 books or more
-multiple people can log in & work on the same project

And I just have to make a note on the last point. I had the privilege of taking the photos this past year for our homeschool co-op, both individual portraits of each person as well as candids. Using this yearbook would've been SOO very handy as I could've uploaded all the photos easily then had the others who helped work on it log on and arrange them effortlessly as numerous people can work on a project together. Not only that, but everyone at co-op could've received a FREE e-book of the whole yearbook as well as order however many they wanted themselves or sent the link to grandparents & others if they wanted to order a book.

The ordering process was simple. They gave you a checklist of questions on how to proof your project. Then you had to select "lock" on your pages (meaning you checked them over & okayed them) before you could order. From there, you select hard or soft cover and gloss or matte. I chose matte.


When I received our book, it arrived in a heavy envelope with the book wrapped in bubble wrap so there was almost no chance of damage happening to the book. I was impressed at the heavy weight of the pages of the book, much thicker quality than previous photobooks I've seen. Pictures came out true to color of how the originals look.

A view of the last page in our book

Overall, I was pleased with how easy it was to design & order the book and happy with how it came out. This would be great for a homeschool co-op, sports team or even putting together pictures from a family reunion. I teach a 30 week cooking class with our co-op and I am thinking of putting together a book like this with all our recipes and pictures of the food we make. I also think I'd like to do a yearly book for our family highlighting pictures of the past year. Lots of options on ways to use this program!

The cost of a 20 page softcover yearbook is $8.49 with additional pages only $.22 a page. Shipping is $8.99 for the first book, $.99 for each book after that then free shipping for over 50.

Photobucket

3 years ago today. . .

I held my son as he took his last breath and met Jesus face to face. It was both the best & worst day of my life all in one single moment. The only reason I say it was the best.... the only positive thing I can take from that day was the experience of feeling the presence of Jesus in that room as he took Noah home. It's something I can't explain, this amazing peace was there and you literally felt Jesus surround us in that moment. It was a surreal experience, one that I have never felt before and haven't felt since.  But of course it was also the worst day of my life as my son died.

My.

Son.

Died.

It feels like yesterday yet at the same time it feels like a lifetime ago. I can't believe it's been 3 years. That day 3 years ago as I walked out of the hospital with empty arms, I couldn't even envision the next day let alone several years down the road yet here I am, still standing.

And it's only by the grace of God I am.


Happy Birthday Noah & Olivia!

Hard to believe yet another July 13th is here! 3 years ago today, we were blessed with Noah's birth 9 days past his due date. Finally, our long awaited second son! Then just 1 year later, our precious rainbow baby decided to surprise us and was born early on Noah's 1st birthday. Such a special bond the 2 of these kiddos have with sharing a birthday, an intertwining of their lives that can only be God-ordained for reasons I'm sure we'll only start to see in the coming years.

What a privilege it's been to be the mom of these 2 amazing kids! It's a bittersweet time, celebrating them both while only one of them is here with us. I long to see the person who Noah would be today, his interests, his personality and his relationship with his siblings, especially with Olivia since they are so close in age. I've loved watching Olivia's spunky & comical personality emerge and look forward to seeing where God leads her in life!

Happy Birthday Noah & Olivia! You both are so very much loved & cherished!

despicable me cake, minions, fondant
These are the 2 cakes I made for their birthday. Olivia LOVES anything with Despicable Me and the minions. I like to think that her & Noah would've had their own little language between each other like these cute cartoon guys do.  They'd probably be devising silly things to do together like the minions do as well!


Reflecting on this date. . .

3 years ago tonight, I was in prodromal labor with Noah, knowing he wasn't going to live once I gave birth to him. I remember wishing sooo bad I could just stay pregnant with him forever if it meant he wouldn't die. I was dreading the Dr appointment the next day.


2 years ago tonight I had just gotten done picking green beans from my garden and making Noah's cake. I settled in for the evening with a feeling of dread as I was 9 months pregnant and anticipating Noah's 1st birthday, never imagining I'd go into labor early, that night in fact, just 1 year later with our rainbow baby. . .

Amazing the memories that the same date can hold.

*sigh* This is such a difficult time of year for us. Bittersweet is the only way I can think of to describe it. I've been struggling again as have the kids. It's so hard when they come to you in tears saying how much they miss their little brother. Yet at the same time, we are thankful for the chance to celebrate both Noah & Olivia's birth. Both such precious miracles!!!

A reminder. . .

In case you missed this post on how I'd love to remember your baby on Noah's birthday, go read it & fill out this form. Feel free to share this as well! You have until Sunday the 14th.


Also, check out Noah's name album and feel free to send a photo that I could add to it!

Dig-It Games- Mayan Mysteries

We were recently given the opportunity to review Mayan Mysteries from Dig-It Games on our iPad. My kids love being able to play games on there and I especially love when those games are also educational! It's a win-win in my book.

The basis of this game is to solve the mystery of figuring out who the thief is that is stealing artifacts from the Maya archeological sites. As you go through this game, you learn accurate historical facts about Mayan culture & customs,  the Mayan calendar, visit different cities and learn facts about them, learn Mayan math, etc.  This is done through comprehension questions, mapping, digging out of artifacts (and having to choose the correct tool to do this). Points are gained for correct answers as well as when you collect the different artifacts. Points are lost if you get answers wrong or break an artifact while trying to dig it out. At different times during the game, you are given different quizzes which if you fail it you are given another chance to try again.

There is a lot of reading in this game, probably more so than your typical iPad game. If you are worried about a struggling reader or have an auditory learner, there is a button you can press and the game will read it to you!!! My son appreciated that as he would rather listen to something than read it himself.

Like any iPad app, this was easy to download. When we started it, we had to kind of figure our way around the game to get started. I admit it took me a little bit to figure out how to use the archaeological tools, not so much using them but realizing I had to swipe my finger in the middle of the screen (we had been touching the tool in the upper left hand corner as it made motions when we did that). A few more descriptions on how to specifically do things throughout the game would've been helpful. One thing to note, this game can only be played by a single player. It can be reset to allow someone else to play. At times my kids played one at a time, other times they gathered together to work at it as a group. They were thankful that the game saves their progress and allowed them to pick back up where they left off. It should be noted once you reach the end of this game, you won't capture the thief as the game tells you there is a Mayan Mysteries 2 coming out. That was a little disappointing for the kids after all the work this game required. Especially for being an educational game I felt there should be some sort of reward for all they did to reach the end.

Overall, it was a good game chock full of facts and engaging graphics. You can check out the demo to see if this a fit for you. If you don't have an iPad, they also have this available to purchase as an online game. This app is geared for children ages 11+ and can be purchased in iTunes for $9.99.
Photobucket

Zucchini recipes

If you stopped by my blog facebook fan page recently, you would've seen how many zucchini I've been harvesting from my garden. Pretty much everyday I've been making something with them, many of them new recipes. I have tried to take pictures as I make things so I can share the recipes with you. So stay tuned, I will be posting more in the days to come!

Today's recipes are easy ones. The first up really isn't a recipe and one that you can really customize to your own tastes.


While this says roasted zucchini, it's actually roasted veggies. This batch above didn't have some of the veggies I typically put in as it was a throw together supper that night so I was in a hurry. Typically though, I throw in peppers, onions, mushroom, broccoli, cauliflower, carrots, zucchini....well, really any veggies I feel like roasting! I chop them into large chunks & drizzle olive oil over it all. Sometimes I also drizzle some balsamic vinegar over as well. I sprinkle them with salt & pepper, sometimes some garlic powder/salt or even old bay. Really, you could do about any seasoning. Lay them on a large pan or cookie sheet. You don't want the veggies stacked or they will steam instead of roasting. I roast them at 400 until they start looking browned. I usually stir them at least once.

Another take on this would be to grill your zucchini. You could either make veggie kabobs with an assortment of veggies or just skewer sliced zucchini. Season the same way (or cheat & use a spray olive oil then sprinkle with seasonings).


Looking for a cool, refreshing summer side dish? Check out my twist on a classic Pa dutch dish. This typical recipe uses cucumbers but since zucchini is so versatile (and I was harvesting it long before my cucs) it worked great in this recipe.

4 cups thin sliced zucchini
1 small onion sliced thin

Put these together in a strainer/colander and sprinkle salt over both. Let sit at least 30 minutes to draw out excess water (otherwise your salad will be soggy. You'd do this also with cucumbers).

In a bowl, mix together:
1/4 cup vinegar
1/4 cup sugar
1/2 cup mayo

Stir till sugar is dissolved. Toss with the veggie mix. Add some salt & pepper to taste. I also add a bit of celery seed. Cover & chill for a few hours.

Keep your eyes peeled for more zucchini recipes coming!!

I cannot. . .


As Noah's 3rd birthday & the anniversary of his death approaches, I am even more reminded of what I have been missing the last 3 years.


Don't forget to please submit your baby's name so we can remember them as we celebrate Noah's life!

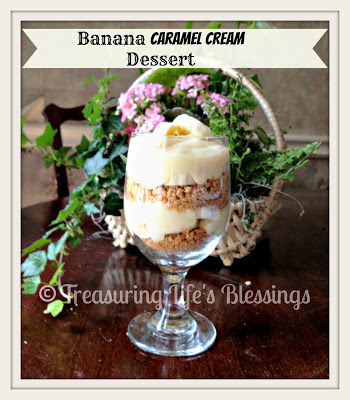
Kids in the Kitchen- Banana Caramel Cream Dessert

If you've been a regular reader of TLB, you know how much I strive to encourage my kids love of cooking. I wasn't given the chance to experiment in the kitchen as a kid so I've wanted to make sure my kids had the chance to become independent & confident in the kitchen from an early age. Hey, it ensures before too long I'll have my own built in chefs!! ha

My girls love to read my cooking magazines or search the internet for new recipe ideas. I bet a day doesn't go by that they aren't pesting to make something or other. Thankfully they are old enough that all I do is glance over their recipe to make sure we have the ingredients and that it isn't something that they'll blow up my kitchen with. From there I tell them to go for it. You won't find me even near the kitchen let alone hovering over them telling them what to do, they are their own unless they have a question which they won't hesitate to come and ask me.

The only rules I have for allowing them to cook is that they have to clean up after themselves and do ALL the dishes they made (we wash by hand, *gasp* I know, we are behind times in not using a dishwasher)

With that said, their latest creation was a banana caramel cream dessert. We didn't have the caramel sauce that it called for so they improvised and sprinkled on some butterscotch chips we had. Courtesy of my girls, the recipe is below, enjoy!

banana caramel cream dessert, dessert, recipe, banana

Ingredients~
Vanilla Pastry Cream (recipe below)
Bananas (I used two bananas for 6 small dessert servings)
Good quality caramel sauce, or dulce de leche.
Fresh whipped cream (I used 3/4 cup heavy whipping cream and 1 Tablespoon powdered sugar)
Graham Cracker crumble (recipe below)
Vanilla Pastry Cream
2/3 cup sugar (can be reduced to 1/2 cup if you prefer desserts less sweet)
1/4 cup cornstarch
1/2 teaspoon salt
3 cups whole milk
2 eggs
2 Tablespoons butter
1 Tablespoon vanilla extract (or 2 teaspoons vanilla extract and 1 teaspoon vanilla bean paste)
Directions:
In a medium bowl,  beat eggs with a fork to combine.  Set aside.
Mix sugar, cornstarch and salt in a medium saucepan.  Gradually pour in milk, while whisking, to make a smooth mixture.  Cook over medium heat, stirring almost constantly, until the mixture thickens and boils.  Continue to cook and stir one minute.
Pour several tablespoons of the hot mixture into the bowl with the eggs and immediately stir well.  Pour warmed egg mixture into the pan with the rest of the hot milk mixture.  Return to a slow boil, and cook one minute, stirring constantly.
Remove from heat and stir in butter and vanilla.  Set aside to cool.  When the pan has cooled, place in the refrigerator to fully cool.  Lay a piece of plastic wrap on the top surface of the pastry cream to prevent a skin from forming.
Graham Cracker Crumble
1 1/2 cups graham cracker crumbs (about 10 full sized crackers)
1/3 cup butter, melted
1 Tablespoon sugar
Crush crackers in a large ziplock type bag.  Pour crumbs, sugar and melted butter into a bowl and , stir until fully combined.  Pour into a 9″x13″ casserole dish and press into a even layer.  Bake at 350*F for 10-12 minutes, until light brown.  Allow to cool.
Dessert assembly~
1.  Spoon about 2 tablespoons graham cracker crumble into individual serving dishes.  Press crumbs down.
2.  Add a layer of pastry cream into each dish.  For easy assembly, fill a large ziplock type bag with the pastry cream, snip off the end and fill the dishes from this bag.
3.  Add a few slices of banana.
4.  Top bananas with a layer of whipped cream.
5.  Add some graham cracker crumble and a drizzle of caramel (scoop caramel or dulce de leche into a small ziplock bag and snip off the end for easy application).
Repeat layers 2-5
Serve immediately or refrigerate up to 3 hours.  Top with a slice of fresh banana just before serving.
Note:  I used 6 small dessert dishes.   If you make 6 desserts, you will have pastry cream and graham cracker crumble left over.  If you want to make more desserts, or one large trifle dish, you will have enough pastry cream and graham cracker crumble for 10-12 individual desserts.  For a large trifle, or more than 6 individual desserts I would double the amount of whipped cream listed above.
Linked up with:
Try a new recipe Tuesday

Schoolhouse Planner Giveaway!

Ahhh yes that time of year again when homeschooling moms start thinking about the upcoming school year, as hard as we try not to. I was dragging my feet to close out this past school year but stick a planner in my hands and I am itching to start organizing the new school year. (Note that just because I enjoy the organizing part does not mean I am ready to start school yet! Just sayin'!)

Have you heard of Schoolhouse Teachers.com?? If you aren't familiar with them, check out my review of this great homeschooling resource. In addition to their wonderful site, they also put out 5 homeschooling planners:

"Big Mama"- $39.99 Called that because this one is over 800 pages chock-full of calendars in different formats, planning pages, charts, field trip logs and transcripts. Also included are must-have lists and things to know such as presidents, periodic table, grammar rules, etc. You'll also find helpful articles, chore charts, meal planning & recipes, plenty of things to help organize not just your homeschool but your home as well.

There are 4 other planners tailored for different levels of students. All 4 planners have close to 200 pages each and have planning pages, calendar, charts, Bible reading schedule, etc. Each different planner also has specific things geared toward each level such as college planning, homeschool IEP, a kid's financial record, chore chart, medical & therapy forms and so much more.

Primary- $9.95 
Intermediate- $19.95 
High School- $29.95
Special Learner- $29.95

The great thing about these planners is that you can customize them however you like. Do you prefer to keep electronic records? No problem, type in your info into any of the pages and save your planner on your computer. Do you like paper records? Perfect! You can either customize your page and then print or just print off whatever pages you like and fill in by hand.

If you become a member of Schoolhouse Teachers.com, ALL of these planners are included (FREE!) in your membership. It only costs $3 for the first month (and all of the planners are available as soon as you sign up) and each month after is $12.95. This website has lesson plans for tons of subjects, unlimited classes, e-books, downloadable learning products just to name a few things. Or you could just choose to buy these planners without a membership.

FINALLY. . .

(click on photo to enlarge for detail)

. . .One of my lucky readers will get to win the Big Mama planner plus their choice of one of the student planners!!! Depending which student planner you choose, this prize could be worth $69.95!! You have till Friday July 12th at midnight to enter! Winner will be contacted via email. Good Luck!!


a Rafflecopter giveaway

Don't forget to submit your baby's name so we can remember them on Noah's birthday!